Sunday, October 24, 2010

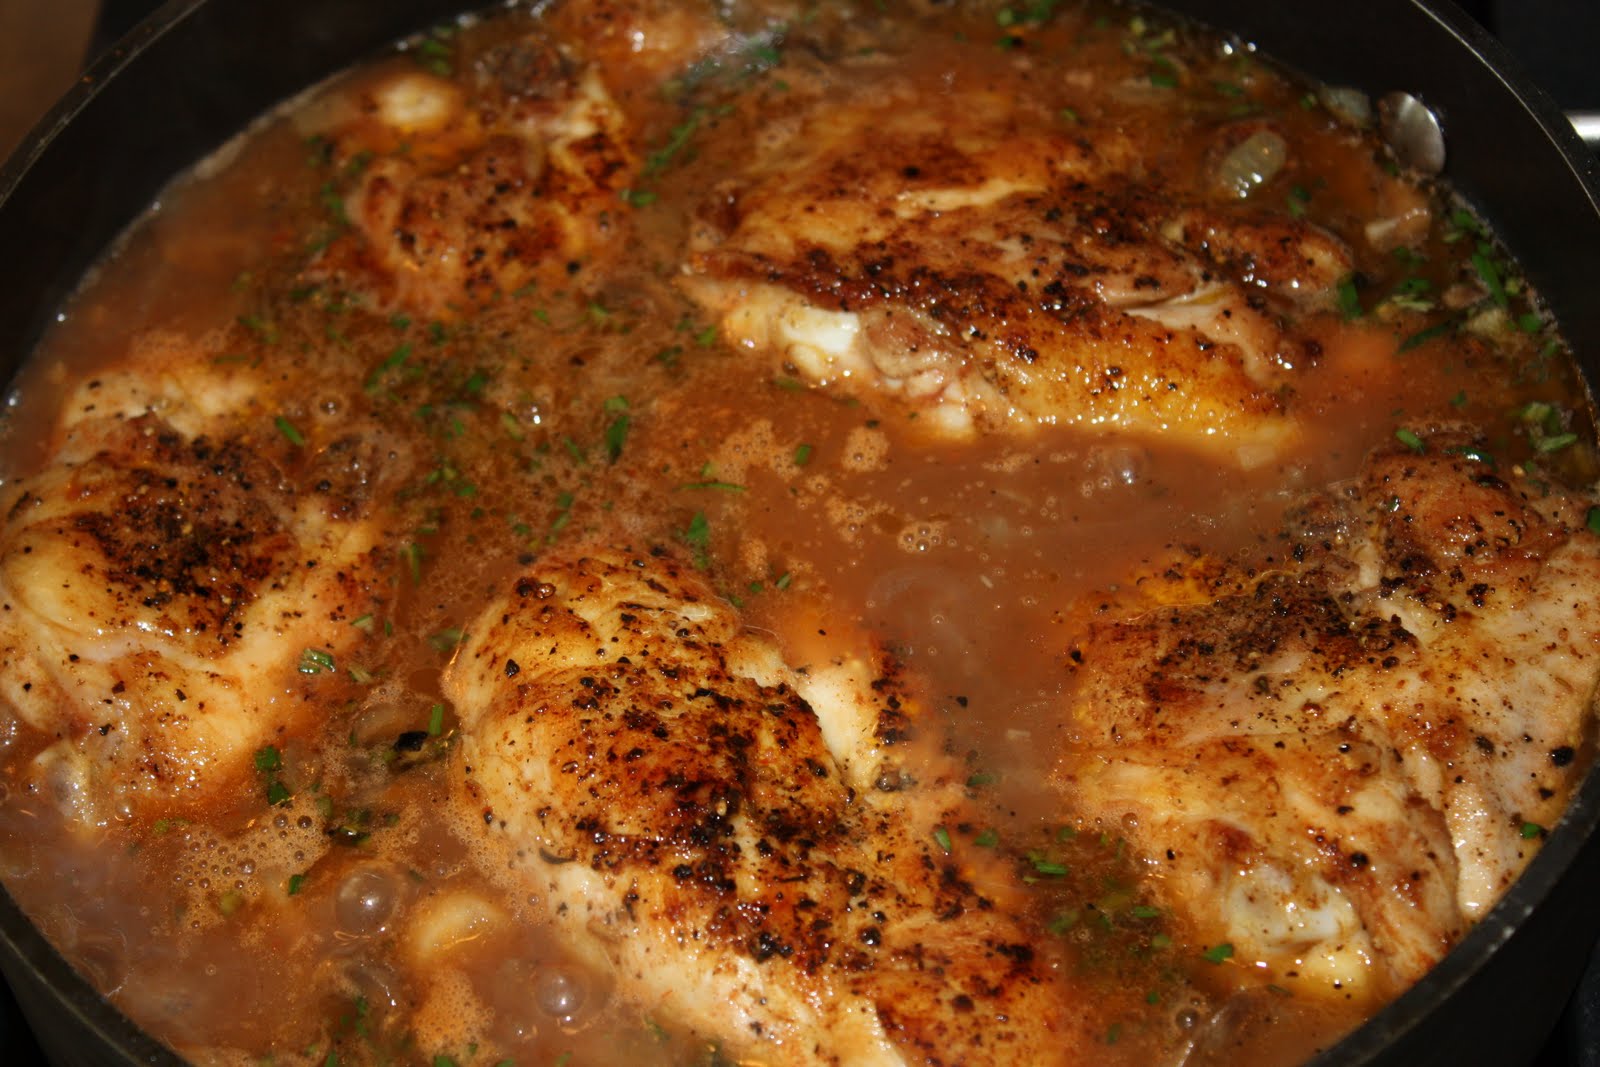
Comfort Chicken

This recipe is comfort food at its finest. It reminds me of something my Mom or Grannie would have cooked for us growing up, but they would have served it over angle hair instead. This meal was delicious, satisfying and flavorful. And the leftovers were to die for - I ate them for an entire week and I normally don't do leftovers.

Braised Chicken Thighs and Button Mushrooms
Adapted from Emeril Lagasse

Ingredients
  • 1 tablespoon olive oil
  • 6 chicken thighs
  • 1 tablespoon Essence, recipe in link above
  • 1/2 teaspoon salt
  • 1/2 teaspoon black pepper
  • 2 tablespoons butter
  • 16 ounces button mushrooms, thinly sliced
  • 1 cup sliced yellow onion
  • 1 tablespoon minced garlic
  • 2 tablespoons all-purpose flour
  • 2 tablespoons tomato paste
  • 2 cups dark chicken stock
  • 2 tablespoons coarsely chopped fresh rosemary leaves
  • 1 pound of bowtie pasta
  • 2 tablespoons chopped fresh parsley leaves
Directions

Set a 10-inch, straight-sided saute pan over medium-high heat and add the oil. Season the chicken thighs with the Essence, salt and pepper. Place the chicken, skin side down in the pan and sear until golden brown, about 3 to 4 minutes. Turn the chicken over and sear on the second side for another 3 to 4 minutes.

Remove the chicken from the pan and add the butter and mushrooms.

Saute the mushrooms, stirring occasionally, until browned and most of the liquid has evaporated, about 4 to 5 minutes. Add the onions and garlic to the pan and saute for 3 to 4 minutes.

Sprinkle the flour into the pan

and cook, stirring often to make a light brown roux, about 4 to 5 minutes. Add the tomato paste, stock to the pan and stir.

Add the rosemary to the pan,

bring to a boil and reduce to a simmer. Return the chicken to the pan, skin side down and cook the chicken for 30 minutes. Turn the chicken over and cook until the meat is very tender, about 30 minutes. Add salt and pepper to taste.

Serve the chicken over pasta and garnish with the chopped parsley.

Click Here for My Adapted Printable Recipe

Tuesday, October 12, 2010

He's Here !

Forrest and I had our first born on October 11, 2010. He weighed 9lbs 9 ounces (can you tell his momma liked to indulge in yummy food while "baking" him?) and was 22 1/4 inches long. We are completely smitten and we can't wait to get him home to start cooking up all of our new adventures that are ahead of us as a family of three!

Meet Rex Paul Foti:

Thursday, September 30, 2010

Ne Ne Nursery

I made this Bananas Foster Bread as a thank you for my wonderful Mom for helping get our soon-to-be son's nursery ready. I have expressed this sentiment before on this blog, but it is worth mentioning again - my Mom is a superwoman. She can do anything, will attempt any job and is more than willing to help in any endeavor. I found a picture on the Internet of a baby nursery I wanted to use as my inspiration, but didn't have the slightest idea of where to start or how to accomplish all of the unique touches I had fallen in love with. I showed my mom the picture, asked her if she would help and if she had any ideas of how to start - of course she did.

The first step was achieving the tree mural that would take up most of the 10 foot wall behind the crib. I told her I found a stick and peel wall decal on the Internet, but she said we could do it ourselves. She started with a free hand drawing of the tree in question, transferred it to a transparency, projected it onto the wall and made a life size stencil. Then I cut it out - that was the extent of my contribution. She then spent a few hours of one of her days off painting the tree using the stencil she had made. And that was just the start of it.

Next up was the fact that I didn't want off the shelf curtains or a bed skirt, so she spent another entire Saturday sewing and hanging curtains, figuring out how to make a crib skirt and whipping that out like a professional. I told you she was amazing! On another Saturday I showed up at her house with some new fabric I wanted to add to the room. As she saw me walk up the stairs to her front door she immediately guessed I had another project in mind for her. That particular day she worked her way through sewing throw pillows and recovering an existing lamp shade in said fabric. The shade and one of the pillows can be seen below, and I told you she could take on any project in spite of lack of experience.

Her last and final project occurred this past Saturday when she spent the day helping me hang these giant flash cards behind the changing table. I wanted them there, I purchased them and the ribbon and then I didn't have a shred of confidence that I could get them hung neatly. Of course she had some really genius idea of how we could do it and she whipped it out in no time at all while we baby sat two of her grandsons.


Some of the other personal touches in the nursery that I love so much are the baby outfits we hung on the wall. No my Mom didn't make these, but they were worn by my two oldest nephews when they were infants. Since my nephews are only six years old now these could hardly be considered heirlooms, but being that they were both New Orleans babies born before Katrina it is miracle that we still have anything from their early life. Since the hurricane hit before they were both one, I spent different portions of the rebuilding process living with each one of them at different times and because of it I have a very special relationship with them and can remember watching them grow each day into little boys. I love having something from each of them in my son's nursery. He will be lucky to have such great older cousins as role models throughout his life.

There is one item though that could be considered an heirloom that made it into the nursery. The white toddler rocking chair below belonged to my husband and was given to him by his Aunt when he was a baby. It used to be brown with a heavily used cotton cover on it that needed some attention. Way before we moved in our house and started this nursery, Forrest began to restore the chair and repaint it a color that would match our decor. He spent several of his Saturdays in his parents garage prepping his chair to pass on this his first born. It is very special to have something of his in the nursery and it has proven to be a very popular piece with my younger nieces and nephews when they have come to visit. Therefore, I have no doubt our son will appreciate it as well.
My mom also crosstiched the alphabet blanket hanging over the crib. She was such a big part of this nursery and she made it all possible. I couldn't have gotten even a quarter of it done without her help. Making this extremely easy bread doesn't even scratch the surface of thank you's that I owe her, but it was a sweet start. I told her recently in a thank you note that if I am half the mom to my son as she has been to me he will be one lucky boy! Here is to my extremely creative, willing and selfless Mom!

Nursery Inspired by Holly Mathis Interiors

Bananas Foster Bread
Adapted from Cooking Light October 2010

Yield: 16 servings (serving size: 1 slice)

Ingredients
  • 1 1/2 cups mashed ripe banana
  • 1 cup packed brown sugar, divided
  • 6 tablespoons butter, melted and divided
  • 1/4 cup dark rum, divided
  • 1/3 cup plain fat-free yogurt
  • 2 large eggs
  • 6.75 ounces all-purpose flour (about 1 1/2 cups)
  • 3/4 teaspoon baking soda
  • 1/2 teaspoon salt
  • 1/2 teaspoon ground cinnamon
  • Cooking spray
  • 1/3 cup powdered sugar
Preparation

1. Preheat oven to 350°.

2. Combine banana, 1/2 cup brown sugar, 5 tablespoons butter, and 3 tablespoons rum in a nonstick skillet.

Cook over medium heat until mixture begins to bubble.

Remove from heat; cool. Place yogurt, remaining 1/2 cup brown sugar, and eggs in a large bowl

and mix until combined. Add the cooled banana mixture and beat with a mixer at medium speed.

3. Weigh or lightly spoon flour into dry measuring cups; level with a knife. Combine flour and next 4 ingredients (through cinnamon) in a small bowl. Add flour mixture to banana mixture; beat just until blended. Pour batter into a 9 x 5-inch loaf pan coated with cooking spray. Bake at 350° for 50 minutes or until a wooden pick inserted in center comes out clean. Remove from oven; cool 10 minutes in pan on a wire rack. Remove bread from pan; place on wire rack.

4. Combine remaining 1 tablespoon melted butter, remaining 1 tablespoon rum, and powdered sugar; stir until well blended. Drizzle over the warm bread.

5. Slice and Serve.

Click Here for My Adapted Printable Recipe

Thursday, September 23, 2010

Crop Craze

Depending on where you live, there may be a bountiful amount of fresh corn in the supermarkets at an amazingly low price right now. I love fresh corn and I love finding new creative ways to use up that super cheap super sweet maize. The corn I used for this dish was probably the cheapest I have ever gotten fresh corn. It was free! My sister in law, Allison purchased it for a family cookout and we didn't end up using it during the meal. When it came time for volunteers to take the fresh corn home, I was front and center. I wasn't sure what I would do with it, but I knew I wanted it and I knew it would end up in something delicious. I just couldn't have imagined it would have been this delicious. This is a great quick and easy side dish that could be served along side any weeknight meal or even star in a special holiday meal like Thanksgiving. You must give it a try.

Corn Pudding
Adapted from Southern Living
July 2001

Yield: Makes 8 servings

Ingredients
  • 1/8 cup sugar
  • 1 1/2 tablespoons all-purpose flour
  • 1 teaspoon baking powder
  • 1 teaspoons salt
  • 3 large eggs
  • 1 cup whipping cream
  • 1/4 cup butter, melted
  • 3 cups fresh corn kernels (about 6 ears)
Preparation

Remove kernels from the cob using a sharp knife or a corn zipper.

Combine first 4 ingredients.

Whisk together eggs, whipping cream, and butter.

Gradually add sugar mixture, whisking until smooth; stir in corn.

Pour mixture into a lightly greased 8 x8-inch square baking dish.

Bake at 350° for 45 minutes or until golden brown and set. Let stand 5 minutes.

*3 cups frozen whole kernel corn or canned shoepeg corn, drained, may be substituted.

Click Here for My Adapted Printable Recipe

Sunday, September 5, 2010

Perfect Petite Potato Pancakes

I have made quite a few appetizers in my day, but this one is definitely on my list of all-time favorites. The flavors are so amazing, they make a beautiful presentation and they are a cinch to throw together. I first made these for a special Mother's Day dinner while living in my Mother-In-Law's home and then again later in the summer for another family dinner. They always satisfy the crowd and I really enjoy making them. Just blogging them has me craving another petite potato pancake!

Smoked Salmon with Horseradish Cream on Potato Pancakes
Adapted from Cooking Light November 2005

Ingredients
  • 1/2 cup all-purpose flour (about 2 1/4 ounces)
  • 2 pounds of shredded frozen hashbrowns, thawed
  • 1/2 cup grated fresh onion
  • 1 teaspoon salt
  • 1/2 teaspoon freshly ground black pepper
  • 2 large egg whites
  • 5 tablespoons olive oil, divided
  • Cooking spray
  • 1/4 cup reduced-fat mayonnaise
  • 3 tablespoons grated Granny Smith apple
  • 2 tablespoons plain fat-free yogurt
  • 4 teaspoons prepared horseradish
  • 4 ounces smoked salmon, broken into 48 pieces
  • 3 tablespoons chopped fresh chives
Preparation

Preheat oven to 400°.

Lightly spoon flour into a dry measuring cup; level with a knife. Combine flour and next 5 ingredients (through egg whites) in a large bowl,

stirring until blended.

Divide mixture into 48 level tablespoon-sized pancakes, squeezing each to remove excess moisture.

Heat 1 tablespoon oil in a nonstick skillet over medium-high heat. Add 16 pancakes; cook 3 minutes on each side or until browned.

Add 1 teaspoon of oil at a time as needed. Arrange on two baking sheets coated with cooking spray.

Repeat procedure twice with remaining oil and pancakes. Bake at 400° for 5 minutes or until cooked through.

Combine mayonnaise, apple, yogurt, and horseradish in a small bowl; place 1/2 teaspoon mayonnaise mixture on each pancake. Top each with a salmon piece; sprinkle with chives.

Click Here for My Adapted Printable Recipe

Tuesday, August 17, 2010

Stuffin' for Muffins

I am feeling particularly "stuffed" myself these days and I felt a strong connection to these sweet treats. These muffins were so easy to pull together and I loved the unexpected surprise in the center. They were a delicious late night treat and just as good the next morning for an unusually naughty breakfast deviation from my plain whole wheat waffles.

Stuffed Chocolate Chip Muffins
Adapted from Betty Crocker

Filling :

1 package (3 oz) cream cheese, softened
1 tablespoon sugar
1 tablespoon milk

Muffins:
1 cup milk
1/3 cup vegetable oil
1 egg
2 cups Gold Medal® all-purpose flour
1/2 cup sugar
2 teaspoons baking powder
1/2 teaspoon salt
1/2 cup semisweet chocolate chips


1. Heat oven to 400°F. Grease bottoms only of 12 regular-size muffin cups with shortening or spray, or line with paper baking cups. In small bowl, mix all filling ingredients until smooth; set aside.

2. In large bowl, beat milk, oil and egg with fork or wire whisk.

Stir in remaining muffin ingredients just until flour is moistened.

Divide batter evenly among muffin cups.

3. Place about 1 rounded teaspoon filling on batter in each muffin cup.

Top with remaining batter.

4. Bake 20 to 25 minutes or until golden brown. Immediately remove from pan to cooling rack (may need to run knife around side of muffins to loosen). Cool 5 minutes. Serve warm or cool.

Click Here for My Adapted Printable Recipe

Wednesday, August 4, 2010

Emeril with Ease

This is one of the easiest Emeril recipes I have ever made. His recipes are normally accompanied by mile long ingredient lists and several detailed steps. Don't get me wrong, it is always worth it - I find his recipes to be reliably delicious every time. But it was refreshing to find one that was such a cinch. Give this a try next time you have crawfish on hand - you won't be disappointed!

Crawfish Smothered Grits
Adapted from Emeril Lagasse

Ingredients
  • 1 pound peeled crawfish tails
  • Salt
  • Cayenne
  • 2 tablespoons olive oil
  • 1 cup chopped onions
  • 1 tablespoon chopped garlic
  • 2 cups beef stock
  • 3 cups half and half
  • 1 1/2 cups quick-cooking white grits
  • 1/2 cup freshly grated Parmigiano-Reggiano cheese
Directions

In a mixing bowl, toss the crawfish tails with salt and cayenne. In a 3-quart saucepan, over medium heat, add the olive oil. When the oil is hot, add the onions. Season the onions with salt and cayenne. Saute for 2 minutes, or until the onions are soft.

Add the crawfish and garlic.

Continue to cook for 2 minutes. Add the stock and half and half to the pan. Season generously with salt and cayenne. Bring the liquid to a boil.

Reduce the heat to medium-low and simmer for 2 minutes. Add the grits and stir constantly until they are very tender, about 10 minutes.

Add the cheese and stir to mix and melt it.

Serve warm.

Click Here for My Adapted Printable Recipe