Sunday, December 9, 2012

"Rock"ing around the Christmas Tree

I was recently given the opportunity to receive some complimentary treats for Holiday baking from an awesome company called Oh Nuts.  I picked something a little less conventional than chocolate chips or pecans.  I was surely going to use my choice for the holidays, but it wouldn't be for baking.  I saw the image below on Pinterest and knew that I would have to recreate it on my own.  Rock Candy is such a fun and rarely seen treat and I LOVE champagne.  This picture is from the original source, as my pictures weren't nearly as gorgeous so I decided to share my inspiration picture instead.  Even though I don't have photographic evidence, this was still so pretty and fun in person.  The rock candy makes the champagne fizzle when you first drop it in and then as it sits in the champagne it slightly sweetens the bubbly.  This is a must do for Christmas or for New Year's Eve!

** Image Credit: Hostess with the Mostess

And since I didn't include my own picture of the champagne/rock candy concoction, enjoy some pictures below of my Casual Christmas Table Setting.


This is how I set my table in our breakfast area for our upcoming Christmas get togethers that are less formal.


I love to decorate for Christmas and had so much fun with this laid back theme using Christmas plaid and natural elements like burlap, fake snow and berries.
 

I love being able to use my white everyday china and mix it up to match the specified holiday and decor.


I am obsessed with the recently ubiquitous antlers in decorating right now, so I instantly fell in love with these deer silhouette glasses.


Hope you enjoy it as much as I do!  Merry Christmas!

Thursday, November 29, 2012

Christmas Wishlist 2012

My last post got quite a bit of positive feedback.  Several of you expressed your pleasure with the "round-up" format I did earlier in the week so I decided to do one more similar post while people are still in shopping mode.  My last list was made up of things I own, love and can attest to their benefits.  This group is my Christmas Wish List.  I channeled my 7 year old self and made a long list of things I want Santa to bring me with zero regard for price, availability or practicality.  And since Santa no longer leaves this Momma gifts under the tree, this is pretty much just a list of amazing gift ideas for YOUR foodie friends and family.  Enjoy!


1.   I have recently been bitten by the Blue and White China/Pottery bug.  I want to collect bunches of beautiful pieces and group them on top of my kitchen cabinets.  This ginger jar is very pricey, but insanely beautiful.  If you keep your eye out, you can find similar pieces at antique shops and on Etsy that are much more inexpensive.

2.  Gift cards are boring, but the latest gift card offering from Cleaver & Co. is pure genius.  Here is the explanation from their website "Explore your way through the animal with the Cleaver & Co. whole animal card. With this card you can get a tour of every section of the animal, sampling a cut from each primal. Cards are available for beef and pork and function as a punch card as you explore your way through the animal, picking up your cuts when you want them and in the order you want."  Amazing, no?!?!  I really think this is the coolest thing ever.  A gift card that just keeps giving, and when the giving comes in the form of meat..... I am sold!

3.  I love the look of these antique dough bowls.  They are so pretty and organic and I would love to have one as an everyday center piece on my long rectangular breakfast table.  I would have a blast changing out what I put inside.  

4.  In the last post I expressed my love of fancy salts.  And fancy salts deserve an equally fancy receptacle.  I would love this olive wood salt keeper to place next to my stove for quick access during cooking.  And you can get this version monogrammed.  Be still my heart!  This Southern girl loves a good monogram.  Absolutely geourgeous!

5.  Although I love my cookbooks, probably 80% of the recipes I cook from these days are accessed on my iPad.  When I saw this accessory I was immediately in love.  Sturdy, eye-level and in the precise most convenient location. 

6.  So this isn't an item you can order online or purchase at a Brick & Mortar store.  This is one of those gifts that require time, dedication and love. I.E. someone has to make it (Forrest, wink wink!).  I really really want my own herb garden, but I want something simple and low maintenance.  How about unique and eye pleasing too?  I saw this tiny herb garden on Pinterest about six months ago and I haven't stopped thinking about it since.  So clever!

7.  One thing I would love to receive as a gift anytime of year is another set of my formal china.  I was lucky enough to amass ten place settings as wedding gifts, but I have a large family on both sides and would love to have enough place settings to use my china for nice adult gatherings.  Twelve place settings would be ideal for my needs.  I don't plan on letting these pretties sit in a cabinet.  I use them and want to continue to every chance I can.  I think a good source of gift ideas is someone's old wedding registry.  What part of their registry was never complete?  It is a sure fire way to ensure they will love their gift, since they asked for it after all ;-)

8.  I love this Le Crueset Utensil Crock.  In fact, I already own one.  But mine is red and it doesn't match my kitchen decor.  I want it in white so I can retire my useful but out of place fire engine red version. 

**Note: I have not been compensated by any of these brands for this post.  These are simply products that I think would make lovely Christmas gifts for your loved ones or for me ;-)

Tuesday, November 27, 2012

Favorite Things 2012

One of my favorite features on some of my favorite blogs is when they do their "Favorite Things" round ups.  I don't have the opportunity to do that type of thing here since my blog is a recipe blog and I strive to stay true to that format.  However, I figured with the upcoming holidays that call for gift giving it would be a good opportunity for me to share some of my favorite kitchen/food related things from the last year.  This isn't a collection of my most used kitchen items (although I can do one of those too if you would like ;-).  These are some unique/specialty items that probably don't appear on a typical wedding registry, but have become very popular in my kitchen.  Any of these would be the perfect gift for the food enthusiast in your life and they span a range of price points too!


1. I have wanted this cookbook for so long and finally ordered it a few weeks ago online.  I am a huge fan of Donald Link's restaurants here in New Orleans and I couldn't wait to own his cookbook.  It is awesome! I can't wait to make the Cajun Chicken and Dumpling recipe, it looks to die for!

2. This is a tablet/notepad of paper place mats - genius!  I can't get enough of these things.  We are a big place mat family, but they get so dirty and yucky that it is embarrassing to have them on our table after a couple of uses and in between washes.  But these you can use once, crumble and throw away - and they are so cute too!

3.  Ok, so I know I am late to the game on this one.  I remember when these things first started to become popular.  It was several years ago and I just wasn't interested.  I got one as a Christmas gift last year and have never looked back.  I have always loved coffee, but was never a morning coffee drinker.  Since I got my Keurig I can't function without my first cup.  I love trying new K-Cup flavors and I also use it to make mugs of hot water for my tea addiction.

4.  Forrest and I love using fancy salts to enhance normal everyday dishes or as a finishing touch to something that is already very special.  If you haven't dabbled in the world of fine salts yet I highly recommend it, you will notice a difference immediately!  We have become quite the salt snobs in our household.  And I mean how cute is this trio?  This is my idea of the perfect stocking stuffer!

5. Paper Straws are the new party hat in my opinion - the must have party supply.  They are so cute bunched together and displayed in a mason jar or already doled out into individual champagne flutes waiting to greet freshly poured cocktails.  They come in a variety of colors and patterns and I never host a get together anymore without a coordinating set.

6. I don't normally give pre-prepared packaged food items as gifts.  I like to cook and I know that freshly made goodies are always so much more delicious than the store-bought goods.  But if you aren't willing to spend time in the kitchen baking Christmas goodies and want to give an edible treat as a gift this year, these chocolate covered honey pecans are the way to go.  I first tasted these several years back when Forrest and I visited Pike's Place Market and I was instantly in love.  I still order them to this day for a special treat around our house.  The funny thing is that I don't really like chocolate OR pecans.  But it doesn't matter one bit, these are insanely delicious and would make anyone on the receiving end very happy.

7. The few people reading this that know me personally know that I am a HUGE champagne drinker.  Definitely my drink of choice.  The problem with being a champagne drinker is that lots of people aren't or only partake on celebratory occasions so I often don't have a partner to help me finish a bottle.  I love this little gadget and one little twist ensures a tight seal that will keep your bubbly bubbly.

8.  I love my Silpat baking mat and wish I had one for every cookie sheet I owned.  I normally bake in large batches and only having one makes me want to scream.  Cutting out parchment and trying to make it fit the pan is maddening.  This would be the perfect gift for the cook/baker in your life because even if they already own one, chances are they would love to have another one.

9. I never owned soup spoons until very recently.  I just didn't think to register for them and then once I realized I really needed them it was hard to find a good set.  I make soup a lot and was embarrassed to serve a bowl with a huge tablespoon.  I don't think my guest really minded, but I think eating soup with a proper soup spoon is so much more enjoyable and it irked me to not be able to provide that luxury to my guest.  Forrest and Rex gave me a proper set for Mother's Day this year and I couldn't have asked for anything better!

10. And last but not least is another local New Orleans cookbook.  Some of my most requested recipes have come from this book and once you read the premise it will be no surprise why.  "After Hurricane Katrina devastated New Orleans, thousands of people lost their keepsakes and family treasures forever. As residents started to rebuild their lives, The Times-Picayune of New Orleans became a post-hurricane swapping place for old recipes that were washed away in the storm. The newspaper has compiled 250 of these delicious, authentic recipes along with the stories about how they came to be and who created them."

**Note: I have not been compensated by any of these brands for this post.  These are simply products that I use frequently in my day to day life and happen to love. 

Monday, November 26, 2012

Honey Do!


We have been suffering through a series of sore throats in our house. I have taken to hot tea and honey for relief.  The huge honey jar on my counter left me thinking of other honey uses.  And I know this really seems too easy to be considered a recipe, but it is a nice way to dress up some fresh bread.  I have been known to always balance out my sweet with salty, so enters the sea salt!  Give this one a try, you won't be disappointed.

Salted Honey Butter

Ingredients: 
  • 1 stick of Unsalted Butter, room temperature
  • 1 tablespoon of Grade A Honey
  • 1/4 teaspoon of Sea Salt
Preparation:

1.  Whip the unsalted butter using an electric mixer for about 2 minutes until soft and fluffy.  Make sure the butter is already room temperature, this will help make the whipping process faster.


2.  Add Honey and Salt with the mixer running and whip for another 1 minute until all of the honey is fully incorporated.


 3.  Place whipped butter in a ramekin and top with a sprinkle of sea salt.  Serve at room temperature with fresh bread or cornbread.


Click Here for My Printable Recipe

Wednesday, November 21, 2012

"Make Me" Mushrooms


I know it seems a little late to be posting Thanksgiving recipe ideas, but this one is so easy it won't take much effort to pull off at the 11th hour.  And trust me, this is an amazing recipe.  Four ingredients and about four minutes of prep time to get this sensationally savory side dish (or appetizer, your choice) in the oven.  But if I am in fact too late to get this added to your menu for tomorrow, keep this recipe around - it is huge crowd pleaser!

Feta and Rosemary Stuffed Mushrooms

Ingredients:
  • 1/4 cup of Feta Cheese, crumbled
  • 1 1/2 teaspoons Rosemary, chopped fine
  • 4 medium Portabella mushrooms, sometimes called stuffing caps
  • 2 teaspoons Worcestershire sauce
  • Fresh Cracked Black Pepper
  • Non-Stick cooking spray

Preparation:

1.  Preheat oven to 400 degrees Fahrenheit.

2.  Mix the Feta and Rosemary in a small bowl.


3.  Wipe mushrooms clean with a clean dry dish cloth.  Pull stem from each mushroom and use a spoon to scrape away the mushroom gills. Discard the caps and gills.

4.  Brush the inside and the outside of the caps with Worcestershire sauce using a pastry brush.


Sprinkle the inside of the caps with cracked black pepper.

5.  Divide the Feta and Rosemary mixture evenly among the mushrooms.  Packing the cheese tight inside the mushroom cavity.  Place the stuffed mushrooms on a cookie sheet sprayed with non-stick cooking spray.


6.  Bake the mushrooms for 20 minutes or until the cheese melts and begins to lightly brown.  Serve immediately.


Click Here for My Printable Recipe

Monday, November 12, 2012

MDA MAC N CHZ

*  Above Image Credit: MDA DairySpot

The MidAtlantic Dairy Association is hosting a 30 Days of Mac & Cheese roundup on their website this month.  I am honored to have my Golden Mac & Cheese (seen below) featured as Day 11.  Check out the link here to see the recipe along with some other very drool worth Mac & Cheese recipes.


Thursday, November 8, 2012

Come out of the Candy Coma


Is everyone ready to detox from all the Halloween candy yet?  I couldn't wait for it to be out of my house.  There is just no need for a huge bucket of candy when two of three people in the household are either a toddler or a Type 1 diabetic!  So glad it is gone.

This is the perfect recipe for returning to healthy eating, not to mention probably the last thing your kids want to be served after eating candy for a week straight ;-)  I don't know why brussels sprouts get such a bad rap - these little guys are delicious, and cute too!  This recipe was very simple and used hardly any ingredients.  It was perfect for a weeknight side dish.  But I feel inclined to warn you, roasting these tiny green veggies will stink up your house.  Something awful!  So even though they are delicious, don't add them to your menu when you are having guest over that you need to impress.

Roasted Romano Brussels Sprouts
Adapted from Cooking Light November 2012


Ingredients

  • 3 tablespoons olive oil
  • 1/2 teaspoon sea salt
  • 1/4 teaspoon freshly ground black pepper
  • 2 pounds Brussels sprouts, trimmed and halved lengthwise
  • Cooking spray
  • 1 ounce pecorino Romano cheese, shaved (about 1/3 cup)


Preparation

1. Preheat oven to 425°.
2. Combine olive oil, salt, black pepper, and Brussels sprouts in a medium bowl; toss well to coat.


Divide Brussels sprouts mixture evenly between 2 small roasting pans or jelly-roll pans coated with cooking spray. Bake at 425° for 20 minutes or until Brussels sprouts are browned and crisp-tender, rotating pans after 10 minutes. Remove from oven. Sprinkle Brussels sprouts evenly with cheese. Serve immediately.


Click Here for My Adapted Printable Recipe

Tuesday, October 30, 2012

Making Morning Muffins


Rex had gotten into the habit of eating Little Debbie Mini Blueberry Muffins for breakfast several days a week.  And since Rex doesn't have any source of income, a checking account, and can't drive to the grocery I had to admit that I was solely responsible for this new habit.   I liked the ease of availability of the muffins and the portability, but figured there had to be a healthier option available to my little tot.  So after a quick Internet search I settled on this recipe.  I let Rex help prepare them figuring that would up the excitement factor and after they were cooled I packaged them off by threes in snack-sized Ziplocs.  I felt much better about these as a component of his morning breakfast than the prior alternative.


Banana Apple Mini Muffins
Recipe from Weelicious


Ingredients

  • 1 1/2 cups all purpose flour
  • 1/2 cup old fashioned oats
  • 2 teaspoons baking powder
  • 1/2 teaspoon baking soda
  • 1/2 teaspoon salt
  • 1 teaspoon cinnamon
  • 3 tablespoons vegetable or canola oil
  • 1/2 cup  honey
  • 1 egg
  • 1/2 cup milk
  • 2 bananas, mashed
  • 1 medium apple, peeled and grated


Preparation

Visit Weelicious's Site at the link below for the preparation steps: http://weelicious.com/2010/06/17/apple-banana-muffins/


Thursday, October 25, 2012

Tostada Technique


I never order tostadas when I dine out and I have avoided making them until this recipe, because to be honest; I just didn't know what to do with them.  I mean, a taco should be rolled up and eaten or at least folded in half - "How do you manage eating a taco on a flat shell?", I wondered!  The reason I even decided to take the plunge and make this recipe was because of the ingredient list.  I love corn and zucchini and figured adding cheese and sour cream to them couldn't hurt. Even up until the point when I served this dish I wasn't sure how to go about eating a tostada.  But as I sat down to my plate I asked Forrest that exact question and he said, "You eat it like a pizza!" And that is what we did.  Not sure if it is proper protocol, but we just picked it up and ate it like a mini pizza.  And it was super delicious!  Make these soon!

Chicken and Summer Veggie Tostadas
Adapted from Cooking Light November 2012


Ingredients

  • 2 teaspoons olive oil
  • 1 teaspoon ground cumin
  • 1/2 teaspoon kosher salt
  • 1/2 teaspoon black pepper
  • 1/2 teaspoon cajun seasoning 
  • 12 ounces chicken breast tenders
  • 1 cup chopped red onion (about 1)
  • 1 cup fresh corn kernels (about 2 ears)
  • 1 cup chopped zucchini
  • 1/2 cup salsa verde
  • 3 tablespoons chopped fresh cilantro, divided
  • 4 (8-inch) fat-free flour tortillas
  • Cooking spray
  • 3 ounces Pepper Jack cheese, shredded (about 3/4 cup)
  • 1 Tbs of Fat Free Sour Cream 


Preparation

1. Preheat broiler.

2.  Heat oil in a large nonstick skillet over medium-high heat.  Combine next 4 ingredients, stirring well.  Sprinkle the spice mixture evenly over chicken.


3.  Add chicken to pan; sauté for 3 minutes. Add onion, corn, and zucchini to pan;


sauté for 2 minutes or until chicken is done. Stir in salsa and 2 tablespoons cilantro.


Cook 4 minutes or until liquid almost evaporates, stirring frequently.

4.  Working with 2 tortillas at a time, arrange tortillas in a single layer on a baking sheet; lightly coat tortillas with cooking spray on each side. Broil 3 minutes or until lightly browned, flipping after 1 1/2 minutes.


Spoon about 3/4 cup chicken mixture in the center of each tortilla; sprinkle each serving with 1/4 cup cheese. Broil an additional 2 minutes or until cheese melts. Repeat procedure with remaining tortillas, chicken mixture, and cheese. Sprinkle each serving with about 3/4 teaspoon of remaining cilantro and a drizzle of sour cream ( I just put my sour cream in a ziplock bag and snipped the end to put it on the tostada). Serve immediately.


Click Here for My Adapted Printable Recipe

Thursday, October 11, 2012

Almost Almond


I don't know why I say it, but I do.  Every single time.  Anytime I eat something that is almond flavored I utter the phrase.  Over and over again.  Like I am some kind of expert.  Like I do it all the time.  As if I am so familiar with it that I couldn't be any more sure of myself.  Without fail. 

The second I bite into anything with even the most obscure hint of almond I can't help but remark, "It tastes JUST LIKE wedding cake!"  Maybe it does, you say.  Perhaps I know, and it is a fair comparison.  But I don't.  I wouldn't have the slightest clue what wedding cake tastes like.  I started to think about it last night and I can't tell you a single wedding I have been to in my memory that I have eaten the cake.  I just don't do it.  I didn't even eat my own wedding cake, not even one year later on my anniversary because I didn't want to figure out how to get the top layer from New Orleans to DC where I was living at the time. 

Why don't I eat the cake? It isn't because I don't like cake, or because I can't squeeze anymore food into an already snug dress.  It has to do with my moves.  I am a dancing machine and weddings are the prime place to strut my stuff.  By the time the cake is cut I am already full from the dinner (which I never miss out on ;-) and well into the refreshments and can't be bothered to leave the dance floor for even a moment to enjoy cake.  Other matters are more pressing, I have priorities!

But I know enough to know that wedding cake traditionally tastes like almond and so I feel confident in my statement.  And I do love almond flavored treats, A LOT - so chances are I would really like wedding cake - if only I could kick off my dancing shoes long enough to indulge.  Maybe next time....


Almond Bread
Adapted from Cooking Light October 2012


Ingredients

  • 1 1/2 cups all-purpose flour
  • 1 1/2 teaspoons baking powder
  • 1/2 teaspoon salt
  • 2/3 cup granulated sugar
  • 2 tablespoons butter, softened
  • 2 tablespoons canola oil
  • 1 (7-ounce) package almond paste
  • 2 large eggs 
  • 1/2 teaspoon vanilla extract
  • 1/2 cup plus 1 tablespoon 2% reduced-fat milk, divided 
  • Baking spray with flour (such as Baker's Joy)
  • 1/4 cup sliced almonds
  • 1/3 cup powdered sugar
  • Dash of salt

Preparation

1. Preheat oven to 350°.

2. Weigh or lightly spoon flour into dry measuring cups; level with a knife. Combine flour, baking powder, and salt, stirring well with a whisk.


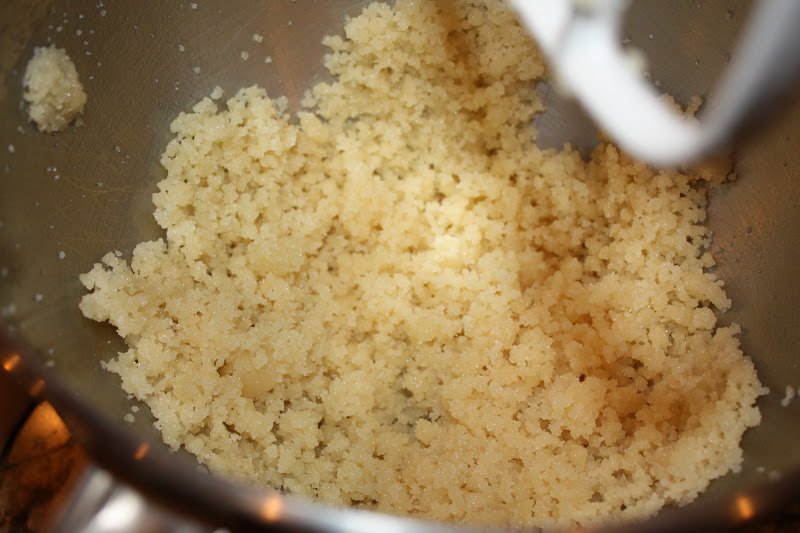
Place granulated sugar and next 3 ingredients (through almond paste) in a large bowl;


 beat with a mixer at medium speed until well combined (about 3 minutes). Add eggs, 1 at a time,


beating well after each addition;


beat in vanilla. Beating at low speed, add flour mixture and 1/2 cup milk alternately to butter mixture, beginning and ending with flour mixture; beat just until combined.

3. Scrape batter into a 9 x 5-inch metal loaf pan coated with baking spray;


sprinkle with sliced almonds.


Bake at 350° for 50 minutes or until a wooden pick inserted in the center comes out with moist crumbs clinging. Cool in pan on a wire rack 10 minutes. Remove from pan; cool on wire rack.

4. Place powdered sugar in a small bowl. Add remaining 1 tablespoon milk and dash of salt; stir with a whisk until smooth. Drizzle glaze over top of bread;


 let stand until set.


Click Here for My Adapted Printable Recipe 

Monday, September 24, 2012

Good Gracious Grilled Cheese


I need to share this recipe before everyone puts their grills away for the cooler weather.  This was AWESOME.  I got this idea from a magazine several months back.  I can't for the life of me remember which one.  I kept saving the ripped out page and then finally "got rid" of it before I ever got around to making this.  It was such a simple concept that I didn't need a recipe, I remembered the basic idea of the dish and then improvised.  Basically I guessed on the grill time, substituted whole wheat baguette because I prefer the flavor and added the garlic rub trick that I learned from one of my co-workers back in VA. I wish I wouldn't have waited so long to give this a try.  This is the most perfect appetizer.  Simple yet elegant, quick yet gourmet, small yet satisfying!  This recipe gives whole new meaning to the idea of "grilled cheese".  Make sure you try it soon!


Grilled Brie Wheel with Grilled Baguette Slices

Ingredients: 
  • Small Brie Wheel
  • Whole Grain Baguette Sliced, 1/4 inch thick
  • 1 glove of garlic
  • Olive Oil
Recipe: 

1.  Cut garlic glove in half and rub on the top of the baguette slices.


2.Brush Brie wheel and the baguette slices with olive oil using a pastry brush.


3.  Grill Brie and baguette slices for 3-4 minutes per side, until grill marks appear.


4.  Serve Immediately.

Saturday, September 22, 2012

I Love Instagram

Follow me on Instagram! My profile name is : eguill3

I share fun images likes this one below:


Rex's first time helping me in the kitchen!